Simplicity S3099 Dress Pattern Review
I recently got invited to a charity ball with a black tie dress code. I can’t resist a stressful project, so I decided that I’d make my own formal dress, despite only having two weeks’ notice. Why do I do this to myself?
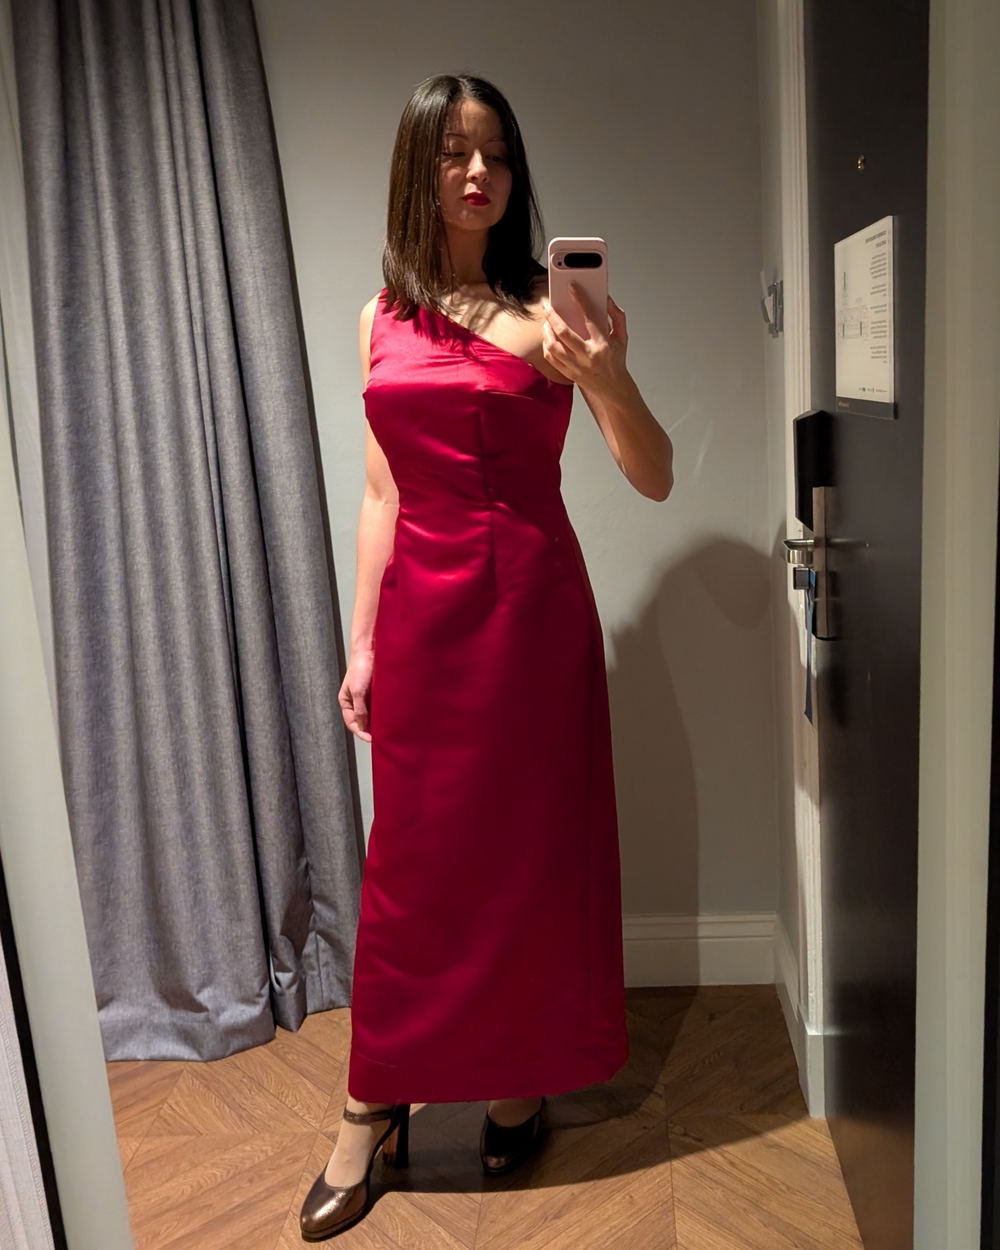
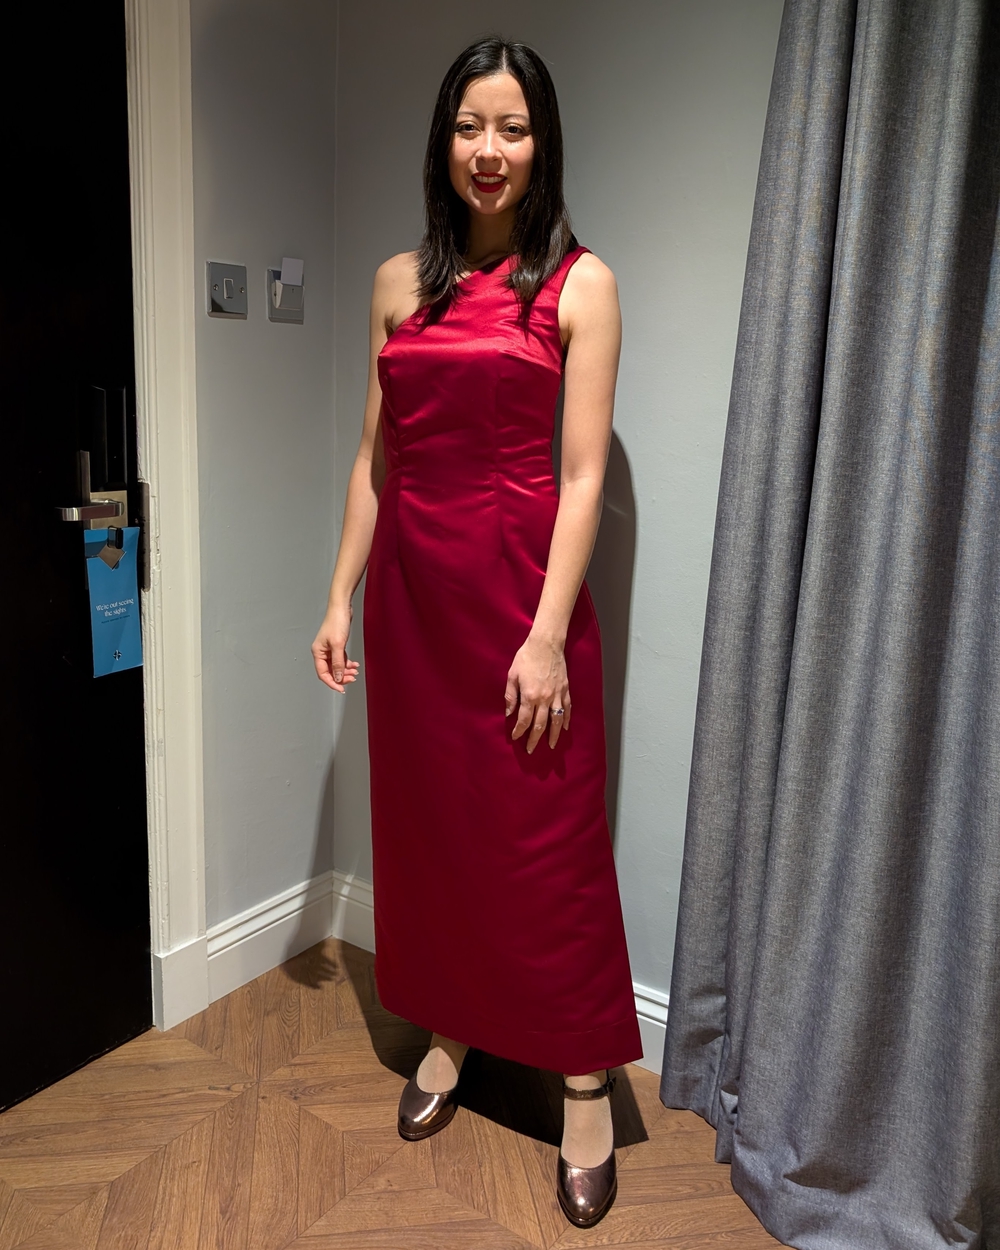
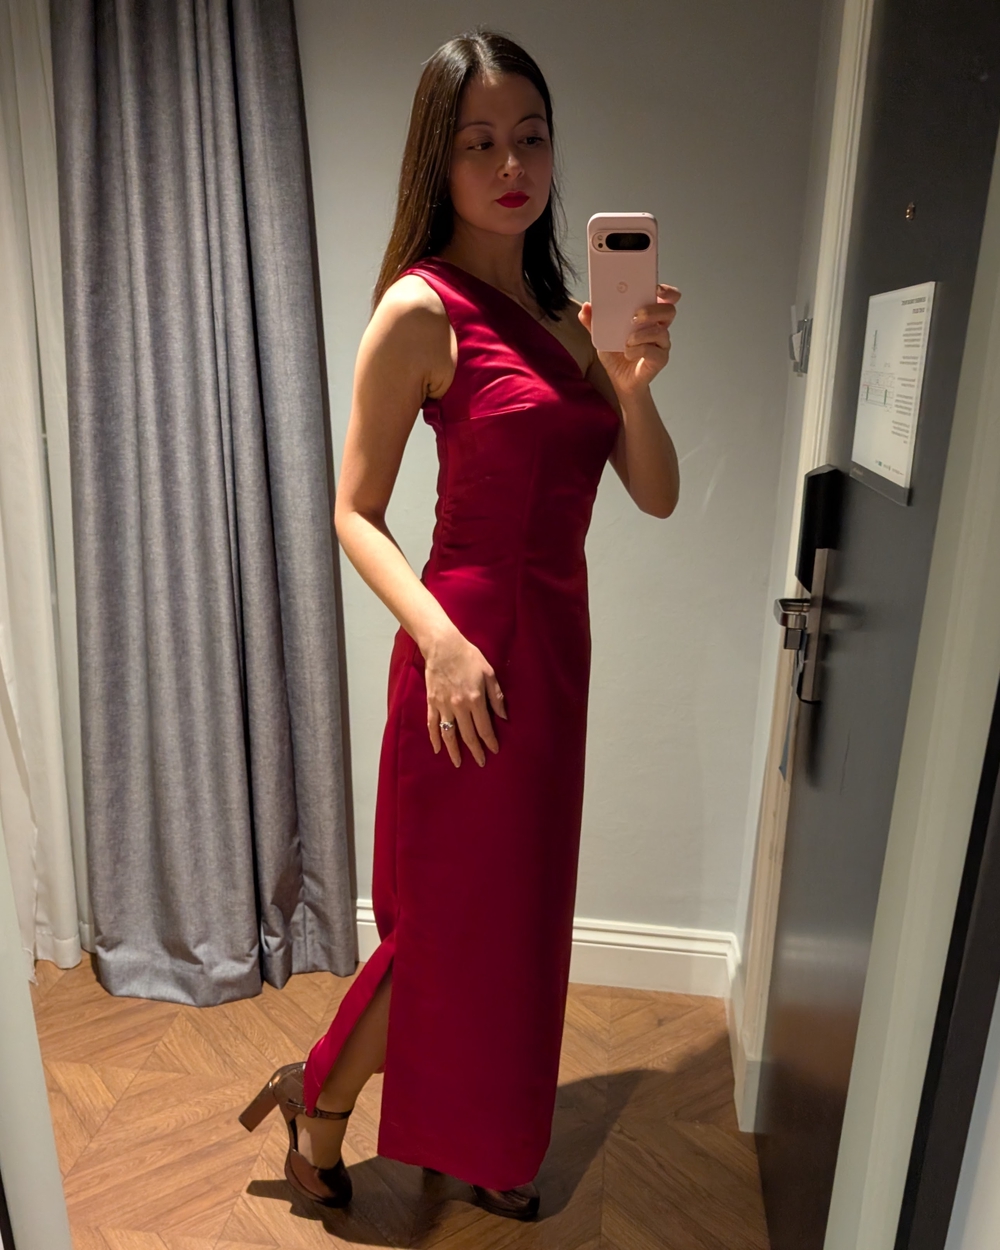
Anyway, it worked out well, although certainly not drama free. There isn’t a lot of talk about this pattern online, so I wanted to add my thoughts to the world. Here’s a lightning quick review of the Simplicity S3099 dress sewing pattern, which I made in view B (full length), in a polyester duchess satin, with a polyester crepe-back satin for the lining.
Why did I pick this pattern?
Of course, I looked at plenty of other patterns, including some gorgeous bias cut slip dresses, and some absolutely stunning pieces with bustiers and boning. I also considered drafting my own dress. But I only had two weeks - including sourcing pattern and fabric!
In the end I picked the Simplicity S3099 because:
- The actual construction looked very straight-forward
- There were not many pattern pieces, so it would be quick to sew
- The simplicity of the design meant it would be make fitting adjustments relatively easy
- It was physically available in John Lewis Leeds so I didn’t have to wait for postage
What fitting adjustments did I make?
I knew from the start that I would need to blend different sizes, and that’s normal for me. I chose 12 for my bust, graded to 14 at the waist, and left it at 14 for the hip.
My first toile looked awful; very baggy and gapey around the bust. So I pinched out a 3cm-ish dart from the neckline on the sleeveless side to improve the contouring, so the neckline would sit flat against my chest. I rotated that excess into the side dart. This actually baffled me for a little while - was it really OK to have one bust dart with a much bigger intake than the other? It would have been nice to distribute the excess into two darts, but I worried that this would make it look even more lopsided. In the end I decided it would be OK (and it was).
My second toile still did not look great. I ended up pinching out a centimeter from both side seams all the way from the underarm down to the hip. I guess this is the famous Big 4 generosity when it comes to ease.
I also cut a total of 4 inches off the hem.
I was pretty happy with the fit at this point. And to be fair - fitting this dress was generally pretty easy for me. I’ve spent a lot more time fitting other dresses before. My scoliosis means I often get asymmetry in fitted garments, but given that this was a one-shoulder design, asymmetry was par for the course anyway.
Transferring adjustments to the lining and facing … or not
All of these changes had to be reflected in the lining and the facing. For the facing, I just overlaid the pattern pieces on top of the main pattern pieces, and trimmed them / slash and spread them to match.
The lining pattern pieces threatened to be a bit more effort, especially given they’re so large and don’t fit on my table. I realised that the lining is actually the same as the main fabric down to the hip, so I didn’t bother transferring my modifications to the lining at all. I just used the main pieces for the top and swapped in the lining pieces for the skirt.
A word of warning if you do this though - make very sure that you know which side up you’re using. Because the pattern is asymmetrical, you need to have the pattern pieces the appropriate way up. The main fabric pieces should be the opposite way up to how you cut them for the main fabric. I did not do this, so I ended up using the wrong side of my lining - but it didn’t really matter.
Some thoughts on the construction
Although there weren’t many pattern pieces, that didn’t make it a quick sew. There were a fair few things to contend with.
The pattern pieces were enormous since it’s a full length dress without a waist seam. I usually cut on a cutting mat on my table, but I had to push the furniture out of the way and do this one on the floor - and that goes for the toiles and adjustments as well. My back hurts just thinking about it now.
Construction was generally straight forward, except for the slit. Honestly, I think the instructions for the slit facing/lining are badly written and possibly incorrect. Step 27 asks you to pin the lining in such a way that means step 28 doesn’t make sense. This is what I actually did:
- I used this How to Sew a Lined Slit tutorial to wrap my head around how the slit should work. That tutorial has a facing that’s shaped on the diagonal rather than the rectangular version we have in S3099, but it was still enlightening.
- Before pinning any of this, I pressed the facing under. I also pressed the lining under by 1.5cm along both the horizontal and vertical edges.
- I used the image in step 27 to understand what the final layout would be, and then pinned the lining to the facing in place, being sure not to catch the main skirt.
- I then flipped the dress so that I could see the seam allowance, and re-pinned it in exactly the same place from the inside, in such a way that I’d be able to sew it. This was fiddly and I had to be particularly careful to make sure the pivot point lined up with the marking.
- I then stitched the 3 edges in one continuous line, being super careful around the corners and the point at the very top of the slit. There was a heck of a lot of finagling to move the main dress body out of the way.

I was lucky - after going through this procedure, it worked first time. I added a few slip stitches to tidy up the top of the slit as there was a little bit of raw edge sneaking out, but overall just going super slowly and super carefully paid dividends.
The pattern asks you to hand-sew the hem, but sod that. I just hemmed it a standard visible straight stitch. NB you have to do this before sewing the lining around the slit facing.
Final thoughts
I was really pleased with the outcome. If I’d had more time I’d have worked a bit harder at getting that pointy dart less pointy, and making those diamond darts a bit smoother (walking foot maybe?) - and I’d have made the flowers too. But I am so pleased with what I achieved in less than 2 weeks.
The dress is very comfortable to wear, but if I made it again, I’d make the slit higher. It gave me enough range of motion to walk around the event in my high heels, but the 20-minute walk to the venue in my flats was a real challenge, as I could only take small steps unless I held the skirt up! In hindsight, I should have shortened the skirt using the lengthen/shorten lines rather than just cutting excess off the hem. This would have raised the slit by 4 inches, which is what I think it needed. Live and learn.
A decent pattern all in all - but probably a lot better if you have a bit more time to invest in it!